Introduction
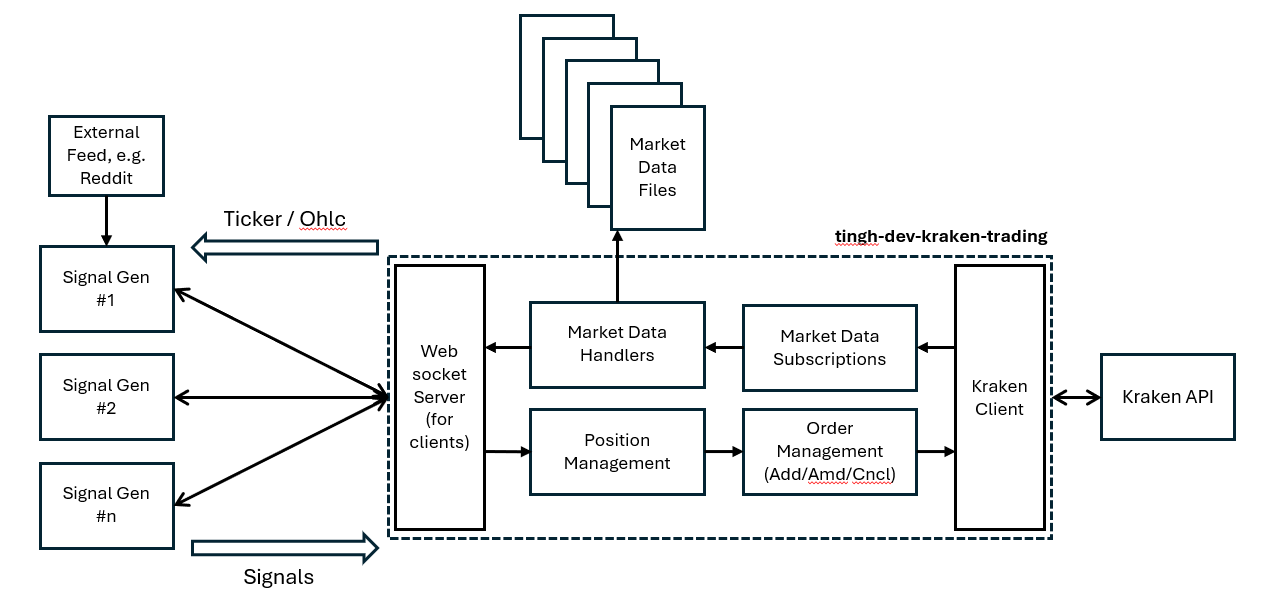
In this post, we’ll cover the simple Python WebSocket client that connects to the trading platform covered previously. The sample client consumes OHLC and ticket data, provides a template for processing the data through technical indicators, and generating actionable trading signals. What makes this framework powerful is its ability to support multiple clients (from a server perspective) and potentially accept external data feeds (from a client perspective). See how it fits into the overall architecture below:

The code for this client is available on GitHub
The Python client has three components:
- WebSocketClient: Manages connections to the WebSocket server
- TradingSignalGenerator: Processes market data and generates signals
- RealTimeChart: Visualises price data and signals in real-time
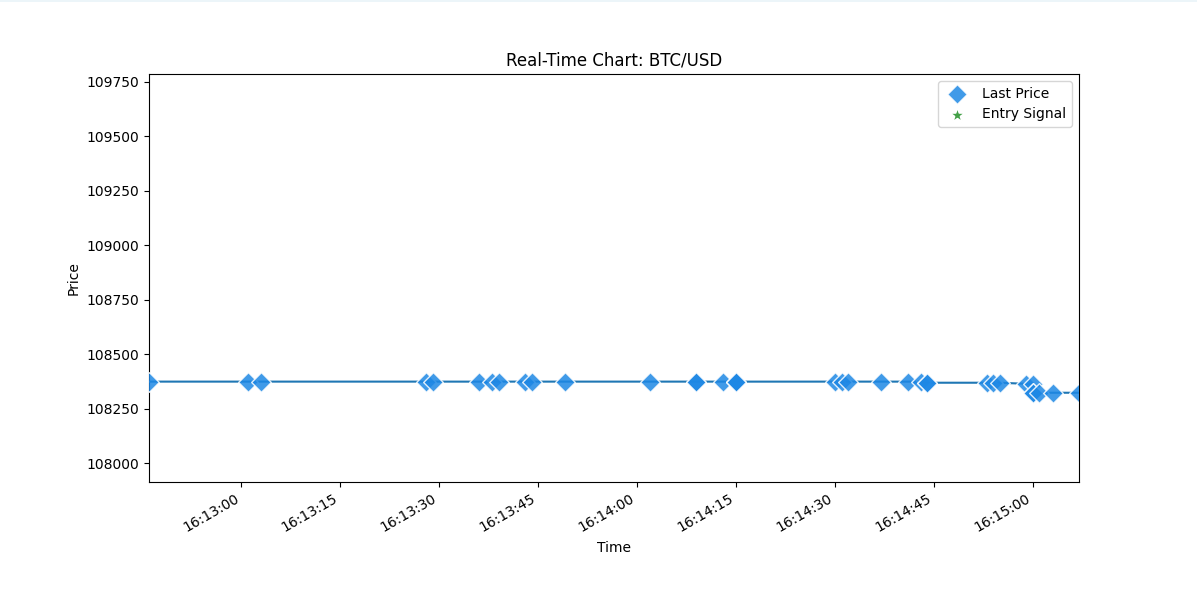
In its default configuration, the client connects to the trading platform’s WebSocket server, subscribes to OHLC and ticker data, however it doesn’t generate signals, that’s left to the user to implement. On the plus side, there is basic charting to get us started:

Extensions
The Kraken Signal Generator provides a simple framework for developing and testing trading strategies in real-time. Some natural extensions include:
- Adding more market data sources from the exchange (e.g. trades, order book), these are received by the server and can be forwarded to the client.
- Reading the market data from a file, rather than a live feed, to allow for backtesting. The files are already being written by the trading platform.
- Implementing more sophisticated technical indicators.
- Incorporating machine learning models/agents for signal generation.
Flow
The code for this client is available on GitHub
The basic flow in signal_generator.py follows these steps:
- Initialise Connection: Create a WebSocket client and establish connection
- Data Processing: Receive market data and update the internal dataframe
- Visualisation: Update the real-time chart with new data and signals
- Indicator Calculation: Process raw data to calculate technical indicators
- Signal Generation: Analyse indicators to generate entry/exit signal
- Action: Publish the signal
Customisations
The flow described in this simple client is by no means an elegant implementation, but it does provide a starting point for building more sophisticated clients.
The three key methods that require implementation are:
def calculate_indicators(self):
    """
    Calculate technical indicators for the latest data.
    This method needs implementation to add indicator values to the dataframe.
    """
def generate_signals(self):
    """
    Determine if a trading signal should be generated based on the latest indicators.
    """
def enter_trade(self, price, time):
    """
    Generate a signal and publish it to the WebSocket server.
    """
Conclusion
This post and the previous post have covered the Java trading platform and the Python client that connects to it. This should provide a solid foundation for building a simple trading platform that can handle real-time data and execute trades based on live market conditions. Hopefully, this will inspire you to build your own.